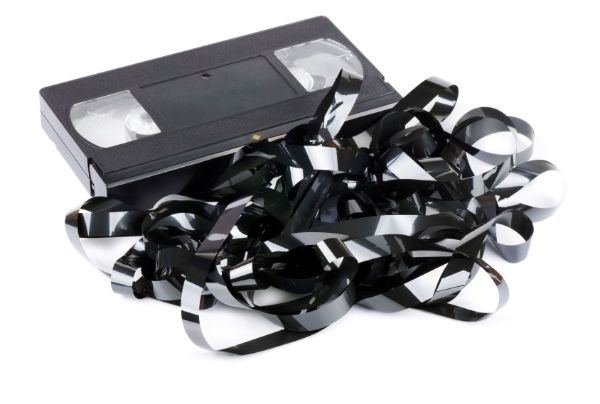
Modern Movies: How to Transfer Videos from PC to iPhone

Having a store of family videos on your computer can be a great way to protect memories. But, sometimes you want your videos on the go, to show to family and friends when you are outside of your home.

In order to do this, you need to transfer your videos from your main computer to your iPhone. It’s much more convenient than carrying around a computer after all. But, what exactly is the process of transferring videos from a PC to an iPhone?


Step One: Connect

Connecting your device is the first step in this process; you may also have to input your lock code to access your files. Also, you must ensure your phone has enough space for the videos you wish to transfer.

Step Two: Sync Your Device

The simplest process of transferring your videos to your device is via syncing. When you sync your device with a computer, which can be done automatically via iTunes, all of the media in your library will be transferred to the phone. If you do not have enough space for it all, you can choose to not sync certain categories, such as music.

Step Three: Other Options

If you have a Mac this process can be much easier than using a Windows computer or another OS. You simply have to use the Photos app in order to transfer the videos from your device to your phone. The Mac allows you to choose whatever it is you wish to transfer, whether it is one thing or one hundred, so this should be a simple process.

It is also possible to simply have your devices connected via the iCloud, meaning you can have all of your videos, photos and other media accessible across your devices at all times. This is especially useful as it means that you do not have to back up all of your media across numerous devices, which can be a time-consuming process.

Ultimately, sometimes you want your memories to be portable and as such transferring them to a mobile device is the perfect solution for this, although at times you may also want to store them on a computer for safe keeping. Here at Video2DVD Transfers we want to make sure that your memories are easily accessible at all times.

For more information contact us on 0800 592 433 and we will be more than happy to help.

Modern Movies: Transferring Videos from iPhone to Computer

Camcorders have become less common in the modern day family life; instead, the mobile phone is more commonly used to take home videos. But, these are so often forgotten and lost in the sea of other photos and videos that also sit on your phone. This does not have to be the case.

MiniDVDs – Understanding What They Are

DVDs (also known as digital versatile discs) have been around for just over two decades and they are used in a variety of different ways, from storing your favourite films to storing your important computer and software files. However, since the invention of DVDs, there have been a few adaptations that are noticeably different, especially when it comes to size.

Here is what you need to know about MiniDVDs.


What are MiniDVDs?

MiniDVDs (circa 1996) are the exact same as DVDs but the main difference is that standard DVDs have a diameter of 12 cm (4.72 in) whereas MiniDVDs have a diameter of 8 cm (3.15 in). The difference in size means that MiniDVDs were originally used for music CD singles. Because of this, they also became known as MiniCDs or the CD single.

The other difference between standard DVDs and MiniDVDs is that standard DVDs can store a maximum of between 4.7 GB and 17 GB of data (this depends on the type of DVD), whereas MiniDVDs can store a maximum of between 1.4 GB and 5.2 GB of data (again, this depends on the type of MiniDVD).

What’s the Difference Between MiniDVDs and Traditional Media?

Other than the two significant differences mentioned in the first section, there are couple of other differences between MiniDVDs and traditional media. In this context, traditional media can be CDs, DVDs, HD-DVDs, etc.

Even though MiniDVDs served the same purpose as CDs and DVDs (to store files and other data), they were considered less popular compared to DVDs because they has insufficient memory, so they couldn’t store as much data, but they were popular compared to CDs as they could store more data, hence they were used more for CD singles.

Even though they are smaller than standard DVDs and CDs, MiniDVDs can still be used in Blu-ray and DVD players, so they are easily compatible with various reading hardware. They can also be used in consoles that can play DVDs and CDs (for example, Xbox 360, PlayStation 3 and the Nintendo Wii).

In fact, when the Nintendo GameCube was introduced in 2001, it became the first Nintendo console to use optical discs as its storage medium, where the optical discs used were, in fact, a variation of the MiniDVD.

MiniDVDs were also used as storage media in recordable DVD camcorders, because they were small, compact and could be taken around with ease. However, with the introduction of smartphones and the like, they have become more obsolete.

Although MiniDVDs may be largely obsolete, plenty of people still have home videos stored on them but because they are still compatible in DVD players, as discussed earlier, it’s easy to transfer them to a more modern form of media, whether that be on DVDs, hard drives or even the Cloud. For more information, get in touch with us on 0800 592 433.

The Evolution of the Camcorder

Today, the camcorder that is used to film home movies and family events holds almost no resemblance to the recorders that began it all. They have gone from being unattainable to the average home hobbyist to being a standard family commodity.


Here’s a look back at the evolution of camcorders; from the barely lift-able straight to the pocket sized.

The Beginning


The first video camcorder was created by a research team headed by Charles Ginsburg at the Ampex Corporation in 1963 – they produced the first video recorder there and it was known as the VR-1500. It was the world’s first home video system and cost an impressive $30,000. It was not portable, weighing over one-hundred pounds, and the camera and monitor were not a reasonable size for home use.

This was a major problem and was addressed later by the Portapack. They were thirty pounds lighter, however they had many drawbacks as each reel only held three minutes of video and had to be put in a lightproof container, and then later developed. These became the tool for photojournalists at the height of their popularity and were used to records all sorts of activities; from cultural events to political rallies.

VHS


Convenience became the name of the game for companies and as such JVC entered the game with the rise of the VHS. They produced the hoist on the shoulder camcorders that came to define the market for over a decade, they were popular as you could shoot straight onto a VHS and then put it into a VCR in order to watch straight away.

VHS also produced much better sound and picture quality than the older reel-style camcorders; colour was also introduced and with the rise of colour television became the new norm. The GR-C1 Videomovie camera was released in 1984, becomingan industry favourite due to all of the afore mentioned benefits and holds a cult following to this day. It was the first ‘all-in-one’ camcorder.

Digital Recording


In 1995 the camcorder world was shaken to its very core by the release of the very first digital recording camera available to the consumer market. Soon there was widespread adoption of DV recording and the interface that allowed users to attach their camcorders to the PC for easy playback.

The quality jump was remarkable and was easily the best on the market available to consumers; it eliminated traditional problems such as white noise and tracking issues. The only downside was that you still needed a small DV tape to record and store the digital footage.

The Palm of Your Hand

Today, digital recording has meant that phones can act as the most convenient and smallest option for all of your home movie needs. HD recording is now the norm as a result of vast improvements across the market. Since the turn of the 21st Century every camcorder has gotten smaller, the picture better and the future seems to be heading into 3D camcorder territory. Home movies will be a fully immersive experience, eventually, an astonishing fact considering where the humble camcorder started.

Here at Video2DVD Transfers, we are dedicated to making your home videos come to life on DVD. We make them easy to watch and quick to enjoy with your family again and again.

For more information contact us on 0800 592 433 and we will be more than happy to help!

VHS: A Ground-breaking Technology

VHS, or Video Home System, was developed by Victor Company of Japan (JVC) in the 1970s. Before VHS, the Ampex VRX-1000 was the first commercially successful VTR introduced in 1956 by Ampex Corporation. With its exorbitant prices of USD$50,000 (more than $400,000 with 2016’s inflation), and USD$300 (over $2,000 with 2016’s inflation) for a 90 minute reel of tape, it was planned for the professional market.

VHS was introduced as a consumer friendly version that quickly took the market by storm. But what made VHS so successful?

What’s the Difference Between PAL and NTSC?

Have you ever heard the terms PAL and NTSC and wondered what they actually mean? NTSC stands for the National Television Standards Committee and PAL stands for Phase Alternating Line, and there are some big differences between the two, which might surprise you, given that outwardly there seems very little difference from one VHS to another.


You’ve probably seen them in relation to VHS, and in its most basic, if slightly inaccurate terms, you could consider PAL and NTSC almost like regions on a DVD. You know how region 1 DVDs can only be played in American DVD players? Well NTSC is sort of the VHS equivalent – it’s used in the Americas and other places like Japan. PAL, on the other hand, was popular in Europe and Australia.


So why the difference?


It’s all down to the electrical outputs. See, in America the AC current runs at 60Hz; countries using PAL have 50Hz currents. This determines how images are broadcast. Video images need to be transmitted at a corresponding Hz level – 30 ‘fields’ per second for even lines; 30 ‘fields’ for odd lines equals a complete picture running at 30 frames per second on an NTSC video. And, naturally, PAL videos run at 25 frames per second, given its 50Hz electrical output.


In this sense, NTSC is the superior format, since more frames per second means a more natural-looking picture, with less flickering. Having said that, PAL allows a lot more picture detail due to the 625 interlaced lines that make up the overall image (NTSC uses just 525 lines). Pros and cons, swings and roundabouts.


Are there any more differences?


Yep. For starters, there’s the automated colour correction offered by PAL, which is non-existent on NTSC tapes. Back when NTSC was created, in the 1940s, colour TV was sci-fi fantasy stuff, so no-one really took it in to consideration, meaning that once colour TVs were no longer dreamland equipment, NTSC wasn’t quite capable of dealing with it effectively. So when the colour seems off, the broadcast can’t sort it out itself. PAL came after the advent of colour technology, so it was built with this in mind.

 photo 3bc515ce-3c1b-4727-8fee-31ff3860e26f_zpst35k1hps.jpg

And then there’s the differing aspect ratios; PAL operates at 720×576 and NTSC opts for 720×480. And then there’s the variance in sound, with NTSC using 4.5MHz and PAL preferring 5.5MHz for increased sound quality. And then there’s…


Bet you never realised there were so many differences between a single format. But if you’re looking for an easy, PAL-based medium fit for the HD world, why not get your VHS transferred to DVD and see things the way they should be? Just get in contact and let us know what you need – we’d love to help.

History of Film: A Home Movies Timeline

Home video is something that we’re extremely passionate about here at Video2DVD Transfers, and in order to fully appreciate just how far it’s come since the first home video was made, we thought it would be a good idea to head down memory lane and take a look at the rich history of film in a home movies timeline!

What to Remember When Shooting Your Home Video

We all want those moments we capture on film to be not only beautiful and memorable, but also watchable – again and again and again. And while you could just happily point your camera in the right direction and press record, if you really want to make an impact, there are a few tips you’ll want to remember.

Frame It Right

There’s nothing worse than thinking you’ve captured the most awesome of awesome moments, only to watch it back and realise you’ve chopped the head off of the bride and groom as they say their vows.Take the time to frame your shot, it might take a little longer, but you’ll regret it if you don’t. This also means you can experiment with your shots, not only to commit every magical moment to film, but also to engage your audience. A good tip is to keep your subject’s eyes around a third of the way down the screen.

Remember the Audio

A picture speaks a thousand words, right? But that’s not the only thing speaking when it comes to home movies. It’s crucial to get the audio right when filming. After all, if you and the viewers can’t understand what’s being said, if it’s inaudible or too loud it can seriously impact the watchability of your film. And be aware that the mic on a camcorder will be able to pick up every little thing – even you reacting to the shots you’re filming. For the best end-product, it might be worth investing in a microphone, to make sure you capture the best audio possible. And if your camera has a headphone jack, make use of it so you can really judge precisely what’s being picked up.

Get Intimate with the Camera

Sure, Hollywood icons know how to ‘make love’ to the camera – but that’s not what we’re talking about here. This is more about actually understanding all the functions that the little black box of magic can perform. There’s no point leaving everything set to auto – auto-focus, auto-lighting and the like – because that means you’re not really in control of what you’re filming.

If there’s a backlight facility, use it so your subject doesn’t end up as a silhouette. And make use of the manual focus, because nothing is worse than watching the picture blur just as the action starts happening. Toy with the various settings, get to know what each does and you’re sure to have even more success with your home movies.

Here at Video 2 DVD Transfers, we know how important those memories are to you, and we want to make them as special as they can possibly be. That’s why we convert video to DVD, so you can treasure those memories for longer. For more information about our services, please contact us on 0800 592 433 or email [email protected] and our professional team will be more than happy to help.

Why Transfer Your Old Videos To DVD?

In homes up and down the country, there are dusty old VHS tapes stored away in attics and at the back of cupboards, going unused and unloved. Why would you want to go rummaging through piles of old boxes in the loft to rediscover those tapes? We’re going to take a look at a few of the reasons why you may want to get those old films transferred onto DVD.